-
Par ElizaSwift le 15 Novembre 2017 à 07:19
If you are a regular user of Epson Printer and sometimes you find that a cartridge will be rejected by the machine for no reason. When printing machine discards the ink cartridge, the user will get an error message as ‘ink cartridge cannot be recognized’ will show on the screen. You can fix this issue easily by taking care of some important things. OR if you are a novice user the don’t worry fix your issue with no time and get in touch with Epson Printer Support Number team experts.

If the ink cartridge is not well-suited or not identified, the follow the below listed steps:
1. Take out the cartridge from Printer
First of all, you have to change the ink cartridge by lifting the top cover or, press a specific button to access your carriage to the slide across.
2. Turn your printer off and wait for sometime
You can turn OFF your printing machine for some time because this Step clears the error. This step is also helpful to ensure that machine is communicating with PC or not and the problem with them has cleared.
3. Turn ON Epson printer back and hold for it to settle down
Nobody wants to be woken up instantly and needs to be time to run the things smoothly and your printer is just like similar. Therefore, you should wait for some time to avoid the hassles and save your time and money on purchasing a new cartridge.
4. Re-install the cartridge independently
If the problem still persisting with your printer and multiple ink cartridges have been declined at the same time, that’s why it is recommended to install them individually.
This Blog definitely helps users to fix the issue. If in some situation you are not able to overcome this error then no need to worry your problem will solve out easily if you take help from Epson experts by dialing 1-800-862-1908 Epson Printer Support Phone Number for Technical Help.
 votre commentaire
-
Par ElizaSwift le 9 Novembre 2017 à 09:30
Facing Dirty spots are printed on brother printer issue and you are looking for its solution. Well, you are landed in the right post. Here we are providing Step by Step guide through our blog to fix this issue. OR For Instant technical Help, you can get in touch With Brother Customer Support Number
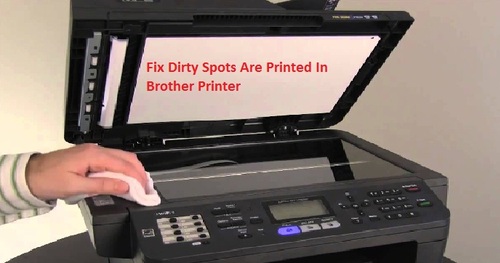
Required troubleshooting steps to fix Dirty spots are printed on the printer:
1. First of all, you have to make 10 to 12 copies of a blank, white sheet of paper.
2. If still, the spots occurred on printing page after making multiple copies, then you need to clean the drum unit as follows:
3. Carefully remove the drum unit after that toner assembles the cartridge, and then finally remove the toner cartridge from the drum unit.
4. Now you need to print a sample page in front of the drum unit. To know the exact orientation point on the drum that is responsible for the poor print.
5. After checking the surface of the OPC (Organic Photo Conductor) drum turn the black gear on the drum.
Note: Always remember one thing do not touch OPC drum with fingers because it is photosensitive.
6. If you find any kind of tiny particles and impurities on the drum surface which matches the print sample then gently clean the surface of the OPC drum with a cotton swab.
7. Finally, take a print page test.
Hope all the above-listed steps are helpful for you to get rid of dirty spots are printed if still, problem exists then you need to get in touch with 1-800-862-1908 Brother Printer Customer Support Number for technical help.
Source Url - https://printersupportsnumber.puzl.com/_news/7-Steps-to-Fix-Dirty-Spots-Are-Printed-In-Brother-Printer/84710
votre commentaire
-
Par ElizaSwift le 1 Novembre 2017 à 12:58
As we all know that Kodak is the most renowned printer brand around the world. A number of users prefer to use this printing machine because it offers high printing quality at pocket-friendly cost with low maintenance. However, there are a few circumstances when users have to encounter a problem with printing device like Ink Cartridge Error, spoiler error, moderate print speed, and printer driver installation issues and so on.
To fix this kind of issue you can easily get in touch with third-party Kodak Printer Support OR you can also resolve some issue on your own by following the instruction given in the blog.
Most Common Kodak Printer Errors
- At the Same Time Not Printing Logo with Texts:
Sometime it happens When Printing device unable to print logo or text at the same time or same page. To get rid of this issue you have to make changes in settings. First, you have to restore the default industrial facility settings and then carefully check the device setting.There could be ‘Print Text Only’ option change it and after that give a requested test to the print.
- Toner Not Working Properly after Replacing:
If you are facing the toner not working properly issue then to avoid this kind of situation you must visit the control load up and tap on the ‘reasonable’ option while opening the cover. And always ensure that you have to reset it each time when the toner is replaced.
- Prints Only One Document:
Most of the time, the device will give you only one printing output. For fixing the issue, you need to Go to the Control Panel and click on the “Printer.” Then right click on the printer image and choose the properties. Now Go to Advanced tab option and tap on features, Change it from one to many and close it. Now restart your System.
Call 1-800-862-1908 Kodak Printer Support Number:
If still, you are unable to identify or resolve the issue, we would recommend you to take help from the experts’ technicians for Kodak Printer Troubleshooting. Avail this number from the website of Printersupportnumbers.com
votre commentaire
-
Par ElizaSwift le 9 Août 2017 à 12:42
Do you want to connect your Lexmark printer to a Gateway Laptop?
If Yes, Then here we have mentioned step by step guide for how to connect Lexmark to gateway laptop with ease.

Way to Connect Lexmark to a Gateway Laptop
Note: These steps can be performed by technically strong people. We prefer contacting Lexmark printer customer care number if you have less idea about technology.
1. First, you have to close all kind of applications which is opened in your Gateway laptop, because sometimes these apps can potentially halt the proper installation of Lexmark printer.
2. Turn on the power supply button of the printer.
3. Carefully insert the installation disc that goes with the printer into the laptop's CD drive.
4. To start the installation process Click on the “Install” button of the installation wizard.
5. Follow the onscreen instruction carefully to successfully install the drivers for the printer on the system.
6. In this step, a pop-up will appear asking you to connect your printer with gateway laptop using USB Cable. Once it is connected you will see the guideline for further step.
7. Before exiting the wizard wait for confirmation message of successful installation

If in case after following the above steps you don’t receive any confirmation message of successful installation or if you fail to connect the Lexmark to Gateway Laptop, Then, in that case, recommended taking help from the printer support professionals by dialing toll-free 1-800-862-1908 Lexmark printer customer support number for technical help.
Source Url - http://printersupportsnumber.pen.io/
votre commentaire Suivre le flux RSS des articles de cette rubrique Suivre le flux RSS des commentaires de cette rubrique


|
|
|
|